A microscope slide might look like a simple piece of glass. However, it functions as a highly engineered platform. It directly dictates diagnostic accuracy. It ensures necessary optical clarity. It also maximizes modern laboratory automation efficiency. Choosing the wrong slide causes major downstream problems. It creates focal inconsistencies during high-throughput scanning. It jams sensitive laboratory hardware. This ultimately leads to lost clinical samples or dangerous misdiagnoses.
You must understand the precise technical variations of these tools. This knowledge helps lab managers, procurement teams, and technicians make informed purchasing decisions. We will explore how different surface treatments perform under harsh chemical staining. You will discover exactly what quality benchmarks matter for reproducibility. Read on to learn how specific hardware designs prevent workflow bottlenecks and safeguard your diagnostic integrity.
Key Takeaways
Microscope slides serve diverse applications ranging from basic educational wet mounts to complex, automated clinical diagnostics.
Selecting the correct surface treatment (e.g., plain vs. adhesion slides) is critical for sample retention during harsh chemical staining.
Quality dimensions such as uniform thickness (typically 1mm) and optical clarity (refractive index near 1.518) are non-negotiable for reproducibility.
Physical design choices, like 45-degree chamfered corners, are often mandatory hardware requirements for modern laboratory automation.
Primary Applications Across Scientific Disciplines
Clinical Diagnostics & Pathology
Modern patient care relies heavily on flawless microscopic analysis. Technicians routinely prepare blood smears to conduct precise cell counts. They analyze complex tissue sections to identify malignancies. In these environments, pathology labs maintain a strict zero-tolerance policy for optical artifacts. A single scratch or air bubble can mimic a cellular anomaly. This leads to false positives. Reliable glass ensures pathologists evaluate actual tissue structures rather than manufacturing defects.
Biological & Histological Research
Academic and private research facilities use specific lab slides to push scientific boundaries. Researchers rely on them for complex cellular tracking. They also use them for cell culturing and advanced immunology. These experiments often require incubating samples over long periods. Substandard glass can leach ions into the culture medium. This alters cellular behavior. High-grade surfaces maintain chemical neutrality. They allow biologists to observe true physiological responses without interference.
Industrial, Forensic, & Specialized Use
Beyond biology, specialized industries demand extreme glass performance. Material science engineers require high thermal resistance to examine metals under intense heat. Forensic investigators demand absolute sterility and zero auto-fluorescence. A fluorescent background ruins trace evidence analysis. Therefore, forensic labs source specially manufactured glass to maintain an unbroken, contaminant-free chain of custody.
Categorizing Lab Slides by Surface and Coating
Plain / Uncoated Slides
Plain slides feature an untreated glass surface. They are best suited for routine, low-stress applications. You will use them when specialized tissue adherence is unnecessary. Standard educational wet mounts fall into this category. Simple fluid analyses, like testing pond water, also work perfectly on uncoated glass. They offer a cost-effective solution for basic observational tasks.
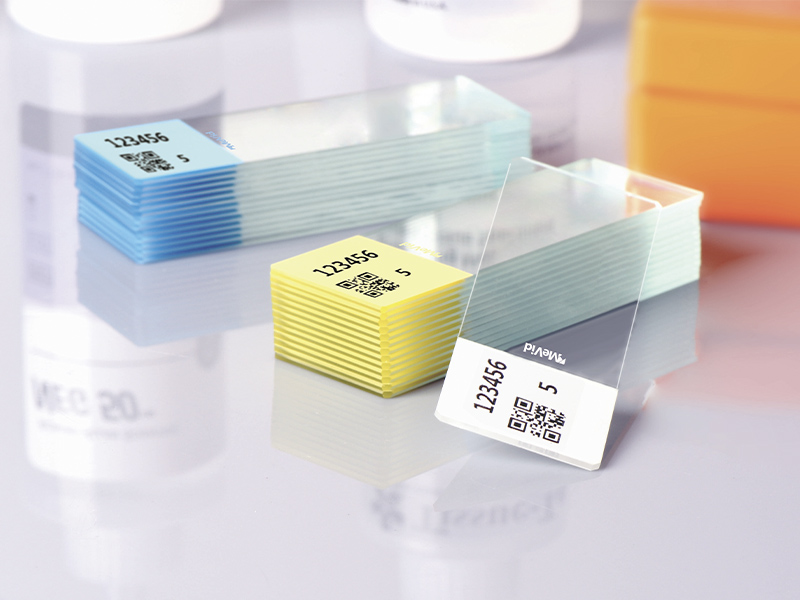
Frosted End Slides
Modern clinical workflows demand strict sample tracking. Frosted end slides solve this problem. They feature a chemically etched or sandblasted end. This textured surface easily accepts pencil marks, ink, and printed barcode labels. Clear labeling maintains the chain of custody. It ensures technicians never mix up patient samples during high-volume testing.
Adhesion Slides & Histology Slides
Aggressive staining protocols easily wash away fragile tissue samples. Laboratories use adhesion slides to prevent this costly problem. Manufacturers treat these surfaces using positively charged coatings. Common treatments include poly-L-lysine and silane.
Tissue sections naturally carry a negative charge. The positive slide coating creates a strong electrostatic bond. You must use histology slides during aggressive protocols like Immunohistochemistry (IHC). Preventing tissue detachment remains the primary risk factor in IHC. Losing a unique patient biopsy forces a surgical redraw.
Advanced / Specialized Materials
Standard glass melts or warps under extreme conditions. Niche alternatives fill this gap.
Fused Quartz: Delivers superior UV transparency. It is mandatory for UV fluorescence microscopy.
Sapphire Glass: Provides extreme thermal resistance. It survives intense laboratory heating without cracking.
ITO-Coated Glass: Features indium tin oxide. This creates an electrically conductive surface for specific research applications.
Glass Slide Use in Practice: Standard Preparation Protocols
Dry vs. Wet Mounts
Proper glass slide use begins with choosing the right mounting technique. Technicians use dry mounts for inert, non-living specimens. You simply place items like hair, pollen, or dust directly onto the glass.
Wet mounts serve a different purpose. They preserve live, fluid-based microbiological samples. You place a drop of liquid on the glass. Next, you lower a cover slip at an angle. This utilizes capillary action to spread the fluid smoothly. It effectively prevents trapped air bubbles.
Smears and Section Mounts
Liquid samples require spreading. A technician places a drop of blood on one end of the glass. They use a second slide to pull the liquid across the surface. This creates an evenly distributed, single-cell layer.
Section mounts deal with solid tissues. A microtome slices the histology samples into ultra-thin ribbons. The technician floats these ribbons in a warm water bath. They then carefully scoop the section onto the glass surface for drying and staining.
Mounting Media Requirements
Permanent preservation requires a high-quality mounting medium. This liquid seals the cover slip to the base glass. It hardens over time.
You must match the refractive index of the mounting medium to the glass. Standard glass has a refractive index of approximately 1.518. Matching this index prevents light distortion. It ensures long-term, crystal-clear preservation for archival purposes.
Common Mistake: Using an incompatible mounting medium causes samples to crystallize or darken over time. Always verify the refractive index before sealing archival patient data.
Evaluation Dimensions: How to Assess Microscope Slide Quality
Glass Composition
Glass material dictates chemical resistance and optical clarity. Most facilities choose between two primary formulations.
Glass Material | Primary Characteristics | Best Use Case |
Soda-Lime Glass | Cost-effective, standard clarity, moderate chemical resistance. | Routine clinical diagnostics and basic educational mounts. |
Borosilicate Glass | Higher chemical resistance, superior optical clarity, minimal artifacts. | High-resolution microscopy and aggressive chemical environments. |
Thickness Consistency
Modern digital pathology relies on automated slide scanners. These machines require a strict 1mm thickness tolerance. Uneven thickness creates immediate problems. It leads to "out of focus" regions across a single sample. The scanner must constantly refocus. This dramatically slows down high-throughput scanning. Consistent thickness guarantees a flat focal plane.
Chemical Resistance & Staining Compatibility
Laboratory routines involve harsh reagents. Xylene, alcohol, and aggressive acids quickly degrade cheap glass. You must assess how well the glass withstands these chemicals. It should not etch, cloud, or degrade. Furthermore, poor-quality glass causes background interference during H&E staining. This background noise confuses automated imaging algorithms.
Surface Cleanliness
Assuming "new" means "clean" is a dangerous fallacy. Manufacturing processes leave behind micro-debris and oils. Slides must arrive pre-cleaned and degreased. Oily residues create hydrophobic spotting. This prevents stains from applying evenly across the tissue. Always verify your vendor utilizes strict pre-cleaning protocols.
Ergonomics and Automation: Evaluating Edges and Corners
Cut Edges vs. Ground Edges
Edge processing impacts lab safety and sample integrity.
Cut Edges: Manufacturers simply slice the glass and package it. This leaves sharp, unfinished borders. These edges present clear safety hazards. They easily slice through nitrile gloves. Worse, they shed microscopic glass shards. These shards contaminate your clinical sample.
Ground Edges: Manufacturers polish the borders until they become smooth. Ground edges ensure polished safety. They improve structural integrity and resist chipping. We strongly recommend ground edges for any clinical environment.
Corner Angles (90° vs. 45° vs. Clipped)
Corner angles dictate hardware compatibility. Here is a strict shortlisting rule for modern commercial labs.
Corner Type | Status in Modern Labs | Impact on Automation |
90-Degree Corners | Largely Obsolete | Sharp corners frequently catch and jam internal machinery tracks. |
45-Degree Chamfered | Universally Required | Glides smoothly through automated slide-handling equipment without jamming. |
Clipped Corners | Niche / Transitioning | Safer than 90-degree, but lacks the precise mechanical fit of 45-degree chamfers. |
Best Practice: Audit your automated stainers and scanners before ordering. Most modern machines explicitly require 45-degree chamfered corners.
Procurement Logic & Risk Mitigation
Unit Economics vs. Downstream Costs
Suppliers traditionally sell glass by the "Gross" (144 units). Procurement teams often hunt for the lowest price per Gross. This strategy frequently backfires. Cheap glass leads to tissue detachment and imaging errors. This forces technicians to retrieve new patient samples and repeat the entire staining protocol. The price of lost samples, required re-testing, and equipment downtime far exceeds the initial savings. Buying quality glass protects your downstream workflow reliability.
Validating Vendor Credentials
You must rigorously vet your suppliers. Never buy uncertified medical consumables. Advise your buyers to check for specific credentials. Look for CE marks and ISO certifications (like ISO 13485). If your lab handles sensitive cultures, demand guaranteed sterile packaging. Certified vendors follow documented quality management systems. This ensures batch-to-batch consistency.
Next-Step Actions
Do not commit to a bulk laboratory contract blindly. Establish a validation framework.
Request small sample batches from three different vendors.
Run these samples through your most aggressive IHC protocols.
Scan the finished samples using your automated digital scanners.
Evaluate the glass for tissue retention, background staining, and machine jamming.
Only sign the bulk contract once a specific brand passes your internal validation tests.
Conclusion
Diagnostic Integrity: The humblest piece of lab equipment heavily dictates your diagnostic accuracy. Prioritize optical clarity.
Automation Compatibility: 45-degree chamfered corners and 1mm thickness are non-negotiable for smooth machine operation.
Workflow Reliability: Shift your procurement mindset. Stop "buying glass" and start "investing in workflow reliability."
Audit Your Inventory: Cross-reference your current inventory against your staining and automation requirements. Eliminate slides causing repeat tests.
FAQ
Q: Why do some microscope slides have a frosted end?
A: Frosted ends feature a chemically etched or sandblasted surface. This texture allows technicians to write directly on the glass using pencils or specialized markers. It also accepts printed barcode labels. This tracks patient samples accurately and maintains a secure chain of custody in busy clinical workflows.
Q: When must a lab use charged or adhesion slides?
A: Labs must use charged slides during aggressive procedures like Immunohistochemistry (IHC) or high-wash histology protocols. These glass surfaces have a positive charge (often via poly-L-lysine). This charge attracts negatively charged tissue sections, preventing the samples from washing away during harsh chemical baths.
Q: Are all microscope slides the same size?
A: Most commercial laboratories use the standard dimension of 75 mm x 25 mm x 1 mm. However, sizes vary by discipline. Geological researchers use larger formats, such as 75 mm x 50 mm, to examine sizable rock sections. Specialized applications dictate specific size variants.
Q: What is the difference between hydrophilic and hydrophobic slide surfaces?
A: A hydrophilic surface attracts water. This causes liquid samples to spread out evenly across the glass, which is ideal for uniform smears. A hydrophobic surface repels water. This contains liquid within a specific area, preventing fluids from spilling over the edges during specialized chemical applications.


